
Vellum wraps or jackets (as some may refer to) serve as a beautiful option for couples who have different pieces to their wedding suites. The translucency (depending on the weight of the vellum paper) adds an elegant layer to the textures and depth of a wedding suite.
Although vellum wraps seem plain and simple, there are varieties of printing methods that can be designed and produced onto vellum paper. Patterns and illustrations can be created by (and not limited to) digital printing, hot foiling, laser cutting, embossing to match the wedding style and or theme.
I personally love the embellishing part of vellum wraps. You can add all types of ribbons such as silk, velvet or chiffon. There's also fine twine and or wax seals to tie or seal the vellum wrap. Additionally, it doubles down as a way to protect the invitations from damage and or, wear and tear during mailing to your recipients.
Do you offer vellum wraps as an add-on?
I currently offer vellum wraps with wedding stationery orders specifically for handmade papers. You may also buy them pre-folded from certain suppliers but I like to customise it as I work with handmade paper.
Why do you customise it and not buy it pre-folded?
Handmade papers feature such delicate and beautiful deckled edges so they don't always fit standard vellum wraps. It's labour intensive to hand cut and fold each and every one of the vellum wraps, however, this is how I know it will fit the handmade papers and exactly why I choose to customise it.
Another reason is... the translucency is essential to clients. Some may prefer a lighter weight which reveals more and others prefer heavier weights which reveal less of what's inside the suite.
Where can I find high quality vellum paper?
A little bit of research goes a long way! I always suggest purchasing samples if you can to test the vellum papers out before committing to larger stock. This way you will not be disappointed and or out of pocket for some paper you don't plan on using.
I am a stationer or very new to this, how do you manage to achieve seamless folds to your vellum wraps?
Well, look no further! Here are a few steps and tips that might help you:
1 — CHOOSING THE RIGHT VELLUM PAPER:
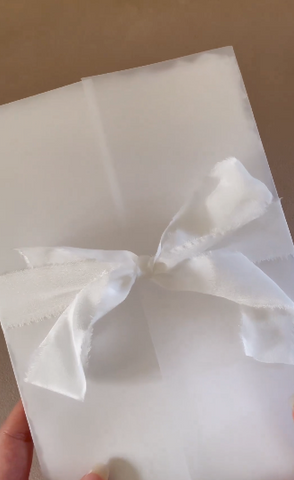
Vellum paper weights determine the translucency of the paper. This varies in between clients and or projects. In the screenshot of my Instagram reel below I am using 120gsm vellum paper. You could use 110gsm to 140gsm for almost the same translucency. It all comes down to personal preference!

2 — FOLDING:
When you’re folding, I find it easier to tap the paper first and then gently score it (vellum paper is very temperamental). If you are wrapping a larger suite, I would suggest not score but tap the corners instead. This creates more room to include for example, detail cards, RSVP cards, directions or map card, wedding invitation and envelopes, etc. (Please note: This is only from personal experience and personal preference for look and feel.)

3 — EMBELLISHING:
My favourite part! Embellishing is the most exciting stage of vellum wraps. As an example, I tied the vellum wrap with the white 25mm width silk ribbon to give it a finished look. There's so much you can do to add a personal touch to a vellum wrap. Popular choices include wax seals and fine twine.
If you are a visual person like me, you can watch my Instagram reel below for a step by step tip! Don't be shy to watch it a few times, I still love watching it back. If you have Instagram, make sure to open it in your app and hit "SAVE" to bookmark it.
Okay, now that you have just read through all the above and maybe watched the reel several times. Go ahead and give it a try. I hope this helped and was insightful for your stationery projects!
If you are already purchasing a wedding invitation suite with me, you can add vellum wraps as an embellishment. Lastly, if you are still unsure and need a little more guidance get in touch with me or through the chat (icon to your bottom right).
Much love, Keth ♡